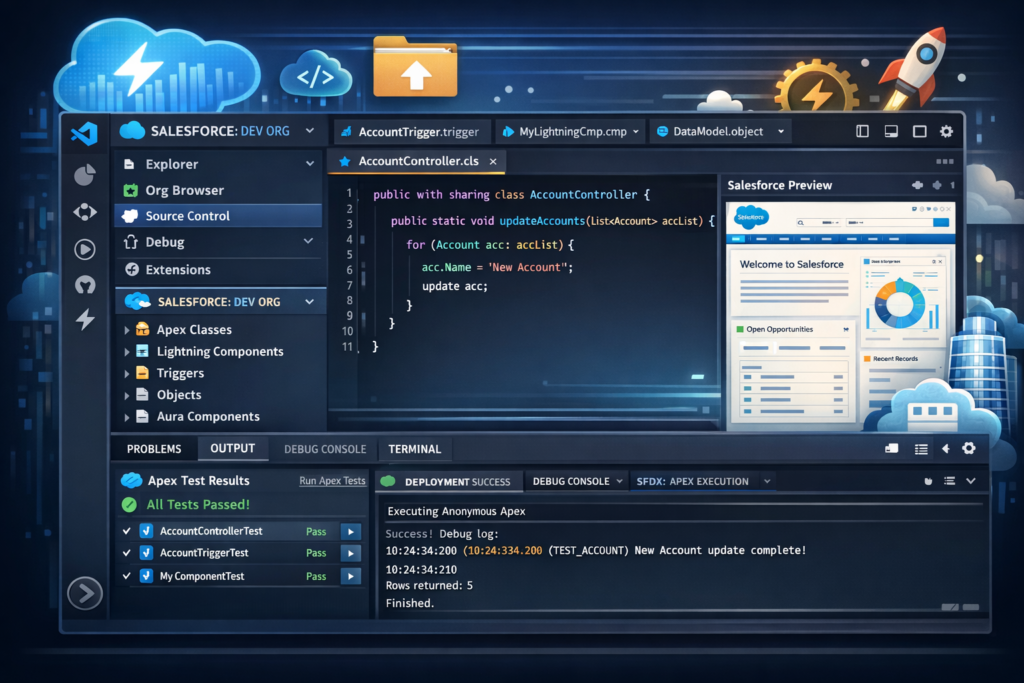
If you are working in Salesforce development, one tool that can completely change your productivity is Visual Studio Code. Many developers still rely only on the Salesforce UI, but once you start using VS Code, you will notice a huge improvement in speed, code quality, and overall development experience.
In this detailed guide, you will learn everything about using Visual Studio Code for Salesforce in simple English, step by step, just like a content creator explaining it in a practical way.
What is Visual Studio Code
Visual Studio Code is a free and lightweight code editor developed by Microsoft.
It supports multiple programming languages and provides powerful features like:
- Syntax highlighting
- Code suggestions
- Extensions support
- Integrated terminal
For Salesforce developers, VS Code becomes even more powerful when combined with Salesforce CLI and extensions.
Why Use Visual Studio Code for Salesforce
Before VS Code, developers used tools like Developer Console or Workbench. But those tools have limitations.
VS Code offers:
- Faster development
- Better debugging
- Version control integration
- Support for modern frameworks like LWC
In simple words, it makes development easier and more professional.
Tools Required to Work with Salesforce in VS Code
To get started, you need to install a few tools.
1. Visual Studio Code
Download and install VS Code from the official website.
2. Salesforce CLI (Command Line Interface)
Salesforce CLI helps you:
- Connect to orgs
- Deploy code
- Retrieve metadata
3. Salesforce Extension Pack
This is a collection of extensions provided by Salesforce.
It includes:
- Apex support
- Lightning Web Components support
- Debugging tools
Step-by-Step Setup of VS Code for Salesforce
Let’s go step by step.
Step 1: Install Visual Studio Code
- Go to official website
- Download and install
- Open VS Code
Step 2: Install Salesforce CLI
- Download Salesforce CLI
- Install it on your system
-
Verify installation using command:
sfdx –version
Step 3: Install Salesforce Extension Pack
- Open VS Code
- Go to Extensions
- Search for “Salesforce Extension Pack”
- Click Install
Step 4: Authorize Salesforce Org
Use command:
- Login to your Salesforce org
- Allow access
Step 5: Create a Salesforce Project
Use command:
- Choose project name
- Select template
Step 6: Retrieve Metadata
To pull code from org:
Step 7: Deploy Code
To push code to org:
Working with Apex in VS Code
VS Code makes Apex development easy.
Features:
- Syntax highlighting
- Code suggestions
- Error detection
Example:
You can create Apex classes, triggers, and test classes directly from VS Code.
Working with Lightning Web Components (LWC)
VS Code is the best tool for LWC development.
Steps:
- Create LWC using command
- Write HTML, JS, CSS
- Deploy to org
Benefit:
You get a modern development experience similar to web development.
Debugging in VS Code
Debugging is much better compared to Developer Console.
Features:
- Set breakpoints
- Step through code
- Inspect variables
This helps in identifying issues quickly.
Version Control with Git
VS Code integrates easily with Git.
You can:
- Track changes
- Commit code
- Push to repositories
This is very useful for team projects.
Useful VS Code Extensions for Salesforce
Some helpful extensions include:
- Salesforce Extension Pack
- Prettier (for formatting)
- ESLint (for code quality)
- GitLens (for Git insights)
Best Practices for Using VS Code
To get the most out of VS Code:
- Organize your project properly
- Use meaningful file names
- Format your code regularly
- Use version control
- Write test classes
Real-Life Scenario
Let’s say you are working on a feature:
Task: Create a Lead Management system
Using VS Code:
- Create Apex class
- Create LWC component
- Test locally
- Deploy to org
- Track changes using Git
This makes development smooth and efficient.
Common Issues and Solutions
Issue 1: CLI Not Working
Solution: Reinstall CLI and check path
Issue 2: Authorization Failed
Solution: Login again using SFDX command
Issue 3: Deployment Errors
Solution: Check logs and fix errors
Final Thoughts
Visual Studio Code is not just a code editor, it is a complete development environment for Salesforce developers.
If you start using VS Code:
- Your development speed will increase
- Your code quality will improve
- Your debugging will become easier
For any Salesforce developer, learning VS Code is not optional anymore, it is a must-have skill.