Many organizations using Salesforce rely on documents such as proposals, agreements, invoices, and reports in their daily operations. Creating these documents manually can take time and may lead to errors. This is where Conga Composer becomes extremely useful. It helps generate documents directly from Salesforce data.
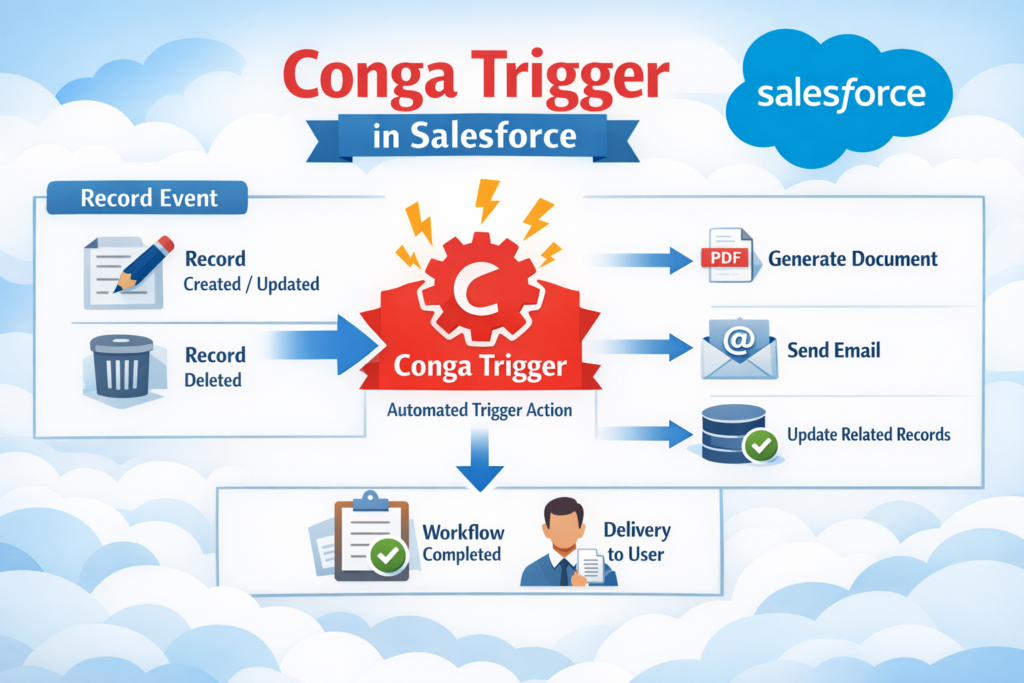
However, sometimes businesses want documents to be created automatically when certain actions happen in Salesforce. For example, when an opportunity is closed or when a new account is created. In such cases, Conga Trigger becomes a powerful solution.
Conga Trigger works as an extension of Conga Composer and allows documents to be generated automatically without the need for users to click buttons or perform manual actions. This blog explains what Conga Trigger is and how to install and configure it step by step in a Salesforce environment.
What is Conga Trigger?
Conga Trigger is an automation tool that works together with Conga Composer. It enables Salesforce to automatically generate and send documents when certain events occur, such as record creation or record updates.
Instead of manually clicking a “Generate Document” button, the process runs automatically in the background.
For example:
-
When an Opportunity is marked as Closed Won, a contract document can be automatically generated and emailed.
-
When a new customer account is created, a welcome document can be sent automatically.
-
When a quote is approved, a proposal document can be generated instantly.
This automation saves time, improves efficiency, and reduces manual effort.
Why Businesses Use Conga Trigger
Automating document generation provides several advantages for organizations using Salesforce.
1. Saves Time
Manual document creation can take several minutes for each record. Conga Trigger eliminates this step by generating documents automatically.
2. Reduces Errors
When documents are generated automatically from Salesforce data, the chances of human error are reduced.
3. Improves Productivity
Sales teams, operations teams, and administrators can focus on more valuable work instead of repetitive tasks.
4. Ensures Consistency
Every document generated through Conga follows the same format and template, ensuring consistency across the organization.
Installing Conga Composer
Before configuring Conga Trigger, it is necessary to install Conga Composer in your Salesforce organization.
Conga Composer is the main tool responsible for generating documents from Salesforce data.
Once Conga Composer is installed and configured properly, you can move forward with installing Conga Trigger.
Installing Conga Trigger
After setting up Conga Composer, the next step is installing the Conga Trigger package.
Download and Install the Package
The Conga Trigger package can be installed either in a Sandbox environment for testing or directly in Production depending on your requirements.
During installation:
-
Choose the option Install for Admins Only to ensure that configuration is managed by administrators.
-
Wait for the installation process to complete.
Enable Conga Trigger
Once the package is installed, the feature must be activated.
To enable it:
-
Raise a support request with Conga support.
-
Ask them to activate Conga Trigger for your Salesforce organization.
-
After activation, you can verify the setup using the Conga Trigger Dashboard.
Setting Up Conga Trigger in Salesforce
Once installation and activation are completed, the next step is configuring the automation process. This includes creating a Conga Solution, building a trigger, setting up outbound messaging, and creating a flow.
Step 1: Create a Conga Solution
A Conga Solution defines how documents will be generated and delivered. It connects templates, Salesforce records, and delivery options.
Before creating a solution, you must first create a template and an email template.
Creating a Conga Template
A Conga Template is the document format that will be generated automatically.
Steps to create a template:
-
Go to Conga Templates in Salesforce.
-
Click New to create a template.
-
Enter a template name.
-
Select the appropriate document type such as Word, Excel, or PDF.
-
Upload the document file that will be used as the template.
This template will pull data directly from Salesforce records.
Creating a Conga Email Template
If the generated document needs to be emailed automatically, an email template must also be created.
Steps to create an email template:
-
Navigate to Conga Email Templates.
-
Click New.
-
Enter a template name.
-
Add the email subject and message content.
-
Provide both HTML and Text versions of the email body.
This template will be used when sending generated documents via email.
Creating the Conga Solution
Once templates are ready, you can create the main Conga Solution.
Steps include:
-
Navigate to Conga Solutions.
-
Click New Solution.
-
Provide a solution name.
-
Select the Master Object such as Opportunity or Account.
-
Add the previously created Conga template.
-
Attach the template to the solution.
You may also add parameters in the Conga URL such as:
-
Record ID
-
Recipient email
-
Additional document generation settings
After configuration, test the solution by creating a sample record and checking if the document generates correctly.
Step 2: Create a Conga Trigger
Once the Conga Solution is working correctly, the next step is creating the trigger that will automate the process.
Steps to create the trigger:
-
Navigate to the Conga Trigger Package.
-
Open the Conga Trigger Formula Builder.
-
Select the Master Object that matches your Conga Solution.
-
Choose the Conga Solution you created.
-
Select the output method such as email or download.
-
Enter a name for the formula field.
-
Click Create Field.
If an error occurs during this process, you can manually create the formula field on the object using the formula provided by the builder.
Step 3: Configure an Outbound Message
Outbound Messages allow Salesforce to send information to external services automatically.
For Conga Trigger to work correctly, Salesforce must send the trigger information to the Conga service.
Steps to configure the outbound message:
-
Go to Salesforce Setup.
-
Search for Outbound Messages.
-
Click New Outbound Message.
-
Select the same Master Object used earlier.
-
Enter the endpoint URL provided by Conga.
The endpoint URL typically used is:
workflow.congamerge.com/OBMListener.ashx
Next, add the following fields:
-
Formula Field created by Conga Trigger
-
Record ID
Save the configuration.
Step 4: Create a Record-Triggered Flow
The final step is building a Salesforce Flow that will send the outbound message when certain conditions are met.
Steps to create the flow:
-
Go to Salesforce Setup.
-
Navigate to Flow Builder.
-
Click New Flow.
-
Select Record-Triggered Flow.
-
Choose the same Master Object.
-
Define the trigger conditions, such as when a record is created or updated.
Next:
-
Add an Action element.
-
Select Outbound Message.
-
Choose the outbound message created earlier.
Save and activate the flow.
Now, whenever the defined conditions are met, Salesforce will trigger the Conga solution automatically.
Monitoring Conga Trigger Activity
After the setup is completed, it is important to monitor the system to ensure everything works properly.
The Conga Trigger Dashboard provides visibility into trigger activity and errors. Administrators can use it to track document generation events and troubleshoot issues if needed.
Final Thoughts
Conga Trigger adds powerful automation capabilities to Salesforce document generation. By combining Conga Composer, triggers, outbound messages, and Salesforce Flow, organizations can automatically create and deliver documents without manual effort.
This automation improves operational efficiency, reduces repetitive tasks, and ensures consistent document generation across the organization.
For businesses that generate large volumes of documents daily, implementing Conga Trigger can significantly improve productivity and streamline workflows.