Sending emails manually every time?
Typing the same message again and again?
Copy-pasting customer names, order details, or case numbers?
There’s a smarter way.
In Salesforce, you can create prefilled emails that automatically pull data from records like Leads, Contacts, Opportunities, or Cases. This saves time, reduces mistakes, and makes your communication more professional.
In this complete guide, I’ll explain everything in simple English — step by step — so you can start using prefilled emails confidently.
What Are Prefilled Emails in Salesforce?
A prefilled email is an email template that automatically fills in details from a Salesforce record.
For example:
Instead of writing:
“Hi John, your case number 000123 has been resolved.”
Salesforce automatically fills:
-
Customer Name
-
Case Number
-
Opportunity Amount
-
Meeting Date
All using record data.
This works using features like:
-
Salesforce Email Templates
-
Salesforce Flow
Now let’s see how to create them.
Why Use Prefilled Emails?
Before jumping into steps, let’s understand the benefits:
-
Saves time
-
Reduces manual errors
-
Improves customer communication
-
Keeps brand messaging consistent
-
Helps sales and support teams work faster
If you’re in Sales, Support, HR, or Operations — this is a must-have skill.
Method 1: Create Prefilled Email Using Email Templates (Most Common Way)
This is the easiest and most widely used method.
Step 1: Go to Email Templates
In Salesforce:
-
Click Setup
-
Search for Email Templates
-
Click “New Email Template”
Choose the type:
-
Text
-
HTML
-
Custom
-
Lightning Template (recommended)
Use Lightning Email Template for better design and flexibility.
Step 2: Add Subject Line
Example:
Subject: Update on Your Case {!Case.CaseNumber}
Here, {!Case.CaseNumber} is a merge field.
Merge fields automatically pull data from records.
Step 3: Add Email Body with Merge Fields
Now write your message.
Example:
Hi {!Contact.FirstName},
Thank you for reaching out regarding case {!Case.CaseNumber}.
We are happy to inform you that your issue has been resolved.
If you have further questions, feel free to reply.
Regards,
Support Team
Here’s what happens:
-
FirstName auto-fills
-
CaseNumber auto-fills
-
No manual typing required
Step 4: Save and Assign Folder Access
Make sure:
-
Template is saved in the correct folder
-
Users have access permission
Now your template is ready.
How to Use Prefilled Email from a Record
Let’s say you want to send it from a Case record.
-
Open the Case record
-
Click “Email”
-
Choose your template
-
Salesforce automatically fills details
Review and click Send.
Done.
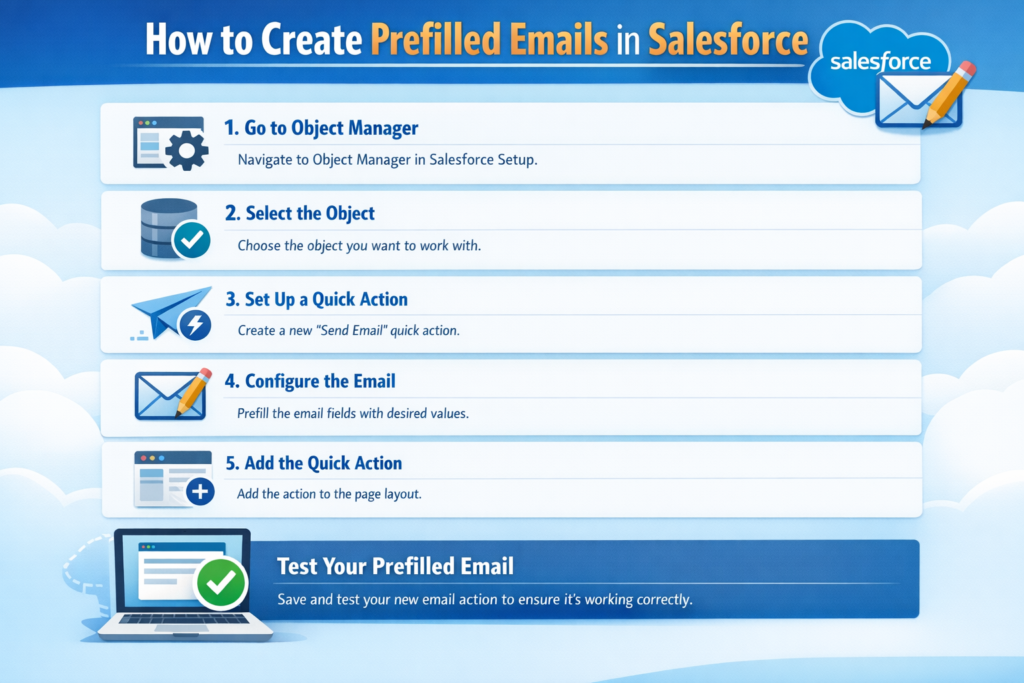
Method 2: Prefilled Email Using Quick Actions
If you want even faster workflow, use Quick Actions.
Quick Actions allow:
-
Predefined subject
-
Predefined body
-
Automatic field reference
Steps to Create Email Quick Action
-
Go to Object Manager
-
Select Object (Example: Opportunity)
-
Click Buttons, Links, and Actions
-
Create New Action
-
Choose Action Type: Send Email
Now define:
-
Default subject
-
Default message
-
Predefined field values
Add this action to the page layout.
Now users can click one button and send prefilled email instantly.
Method 3: Prefilled Emails Using Flow (Advanced Automation)
If you want automatic emails (without user clicking):
Use Flow.
With Salesforce Flow you can:
-
Trigger email when Opportunity is Closed Won
-
Send onboarding email when Lead converts
-
Notify customer when Case status changes
Steps:
-
Create Record-Triggered Flow
-
Define trigger condition
-
Add “Send Email” action
-
Use merge fields dynamically
Now emails are fully automated.
Real-World Use Cases
Here are practical scenarios where prefilled emails are powerful:
Sales Team
When Opportunity moves to Proposal stage → Send pricing email automatically.
Support Team
When Case is closed → Send resolution email.
HR Team
When Candidate stage changes → Send interview confirmation.
Operations
When Invoice is generated → Send payment reminder.
Best Practices for Prefilled Emails
To make your emails look professional:
-
Keep subject clear and short
-
Use dynamic fields carefully
-
Always test template before going live
-
Avoid too many merge fields
-
Use professional branding
Common Mistakes to Avoid
-
Using wrong object merge field
-
Forgetting folder permissions
-
Sending without testing
-
Hardcoding values instead of dynamic fields
Always test with sample record before production use.
Prefilled Emails vs Manual Emails
| Feature | Prefilled Email | Manual Email |
|---|---|---|
| Time | Fast | Slow |
| Errors | Minimal | High risk |
| Consistency | High | Low |
| Automation | Possible | No |
Clearly, prefilled emails improve productivity.
SEO Keywords You Should Know
If you are writing or learning about this topic, focus on:
-
How to create email template in Salesforce
-
Salesforce merge fields
-
Prefilled emails in Salesforce
-
Salesforce email automation
-
Salesforce Flow send email
These keywords have strong search demand.
Why This Skill Matters for Career Growth
Knowing how to create prefilled emails shows:
-
You understand automation
-
You reduce manual work
-
You improve user efficiency
-
You design smarter CRM workflows
For Admins and Developers, this is a basic but powerful skill.
Final Thoughts
Creating prefilled emails in Salesforce is simple once you understand:
-
Email Templates
-
Merge Fields
-
Quick Actions
-
Flow Automation
Start with templates.
Then explore Quick Actions.
Then move to Flow for full automation.