
Integrating Salesforce into Flutter to Insert Leads
Introduction
This blog post walks you through integrating Salesforce with a Flutter mobile application. You’ll learn how to insert Lead records into Salesforce directly from a Flutter app using Salesforce REST API. This is especially useful for building apps like dealer registration, customer onboarding, or lead capture systems.
Prerequisites
– Salesforce Developer Account
– A connected app in Salesforce with OAuth credentials
– Flutter SDK installed
– Basic understanding of Dart and Flutter
– Access token or credentials for Salesforce authentication
Salesforce Setup
- Login to your Salesforce Developer account.
2. Navigate to Setup > App Manager > New Connected App.
3. Enable OAuth Settings and provide a callback URL and selected OAuth scopes (e.g., ‘Full Access’, ‘Perform Requests’).
4. Save the app and note the Consumer Key and Consumer Secret.
5. Create custom fields in the Lead object if needed (e.g., Vehicle_Name__c).
Flutter Project Setup
- Create a new Flutter project:
`flutter create salesforce_lead_app`2. Add dependencies in `pubspec.yaml`:
“`yaml
http: ^0.14.0
flutter_dotenv: ^5.0.2
“`
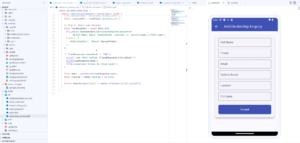
Insert Lead from Flutter
- Create a form in Flutter to collect user input (e.g., Name, Email, Phone, Vehicle Name).
2. Use the `http` package to send a POST request to Salesforce.
3. Sample code to insert a lead:
“`dart
import ‘package:flutter/material.dart’;
import ‘package:http/http.dart’ as http;
import ‘dart:convert’;
class LeadForm extends StatefulWidget {
@override
_LeadFormState createState() => _LeadFormState();
}
class _LeadFormState extends State<LeadForm> {
final _formKey = GlobalKey<FormState>();
String name = ”, email = ”, phone = ”, vehicle = ”;
Future<void> submitLead() async {
var url = ‘https://yourInstance.salesforce.com/services/data/v58.0/sobjects/Lead’;
var token = ‘YOUR_ACCESS_TOKEN’;
var response = await http.post(
Uri.parse(url),
headers: {
‘Authorization’: ‘Bearer $token’,
‘Content-Type’: ‘application/json’
},
body: jsonEncode({
‘LastName’: name,
‘Email’: email,
‘Phone’: phone,
‘Company’: ‘Self’,
‘Vehicle_Name__c’: vehicle
}),
);
print(response.body);
}
@override
Widget build(BuildContext context) {
return Form(
key: _formKey,
child: Column(
children: [
TextFormField(onChanged: (val) => name = val),
TextFormField(onChanged: (val) => email = val),
TextFormField(onChanged: (val) => phone = val),
TextFormField(onChanged: (val) => vehicle = val),
ElevatedButton(onPressed: submitLead, child: Text(‘Submit’)),
],
),
);
}
}
Security Notes
– Never hardcode sensitive data in your code.
– Use OAuth securely and refresh tokens if needed.
– Use `.env` file to store credentials and access tokens securely.
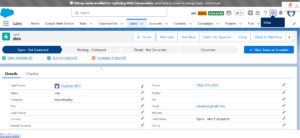
Conclusion
By integrating Salesforce with Flutter, you can build powerful apps that interact directly with your CRM. This setup allows field agents, dealers, or sales reps to submit leads directly from their mobile devices in real-time.